Jenkins & SonarQube under Apache Reverse Proxy
When you’re building a complete development setup on a single server, you will have to use different ports for different applications. But these ports are not user-friendly to be used with developers. Instead of this, I’m going to explain how to use a reverse proxy to get these applications to subdirectories of your root domain.
In this article, I have used Ubuntu 20.04 LTS. Installing methods and locations might differ from other operating systems.
Setup Jenkins
Install the Jenkins LTS version with the following commands.
$ curl -fsSL https://pkg.jenkins.io/debian-stable/jenkins.io.key | sudo tee \
  /usr/share/keyrings/jenkins-keyring.asc > /dev/null

$ echo deb [signed-by=/usr/share/keyrings/jenkins-keyring.asc] \
  https://pkg.jenkins.io/debian-stable binary/ | sudo tee \
  /etc/apt/sources.list.d/jenkins.list > /dev/null

$ sudo apt-get update
$ sudo apt-get install fontconfig openjdk-11-jre
$ sudo apt-get install jenkins
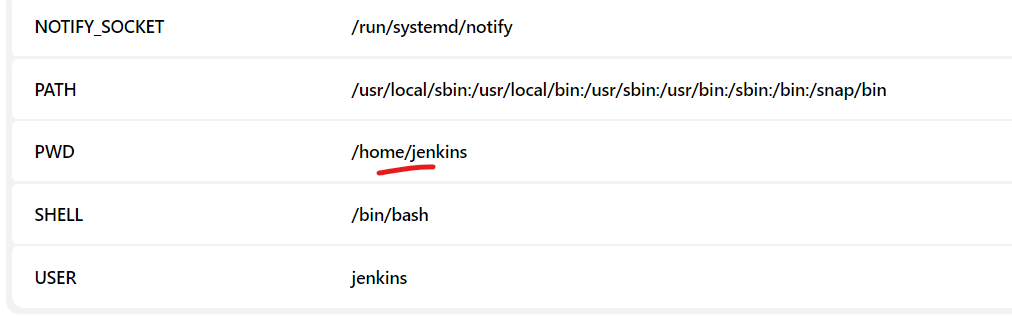
After installing, I’m going to move Jenkins Home to a different directory from the root. This is not compulsory, in case you don’t like having the Jenkins Home on the root directory, you can use this method.
$ sudo systemctl stop jenkins
$ sudo mv /var/lib/jenkins /home
$ sudo ln -s /home/jenkins /var/lib/jenkins
$sudo systemctl start jenkins
Now if you visit yourdomain.com:8080 or localhost:8080, you should be able to log in to the Jenkins instance. If you have moved the Jenkins home directory, you’ll be able to verify it by going to system info in your Jenkins instance and looking for PWD.
Move Jenkins to a Context Path
Now your Jenkins instance is running on localhost:8080. We need to make it run on a context path like localhost:8080/jenkins in order to map the yourdomain.com/jenkins directory to your local instance.
Use the following command to edit the Jenkins service override file.
$ sudo systemctl edit jenkins
And add the context path as follows.
[Service]
Environment="JENKINS_PREFIX=/jenkins"
Then use Ctrl+O and Enter combinations to write out the changes and Ctrl+X to exit. Once it’s done, restart the Jenkins server.
$ sudo systemctl restart jenkins
If everything is good, you should be able to access your Jenkins instance on yourdomain.com:8080/jenkins or localhost:8080/jenkins.
Setup Apache Server
If you haven’t installed the apache server, use the following command to install it.
$ sudo apt install apache2
Then enable the following modules which will require adding reverse proxy.
$ sudo a2enmod rewrite
$ sudo a2enmod proxy
$ sudo a2enmod proxy_http
$ sudo a2enmod proxy_balancer
$ sudo a2enmod lbmethod_byrequests
$ sudo a2enmod headers
And reload and restart the apache server.
$ sudo systemctl reload apache2
$ sudo systemctl restart apache2
Now open the default enabled site with the following command and comment out everything in it.
$ sudo nano /etc/apache2/sites-enabled/000-default.conf
And then put the following virtual host in it.
 <VirtualHost *:80>
  ServerName yourdomain.com
  ServerAlias yourdomain

  RewriteEngine On
  ProxyRequests Off
  ProxyPreserveHost On

  ProxyPass /jenkins http://localhost:8080/jenkins nocanon
  ProxyPassReverse /jenkins http://localhost:8080/jenkins

  AllowEncodedSlashes NoDecode

  <Proxy http://localhost:8080/jenkins*>
    Order deny,allow
    Allow from all
  </Proxy>
</VirtualHost>
And then reload and restart the apache server.
$ sudo systemctl reload apache2
$ sudo systemctl restart apache2
Now you can use yourdomain.com/jenkins/ to access your Jenkins instance.
Important:
Go to Manage Jenkins -> Configure Global Security and tick the Enable proxy compatibility checkbox under CSRF Protection. Otherwise, you may get server errors from time to time.

Setup SonarQube on a Context Path
Stop your existing SonarQube instance and open sonar.properties file.
$ sudo systemctl stop sonar
$ sudo nano /opt/sonarqube/conf/sonar.properties
Then uncomment the sonar.web.context line and add your context path.
# Web context. When set, it must start with forward slash (for example /sonarqube).
# The default value is root context (empty value).
sonar.web.context=/sonarqube
Now start the SonarQube server.
$ sudo systemctl start sonar
You’ll be able to access your SonarQube instance with yourdomain.com:9000/sonarqube or localhost:9000/sonarqube.
Reverse Proxy Setup for SonarQube
Now open the default enabled site again.
$ sudo nano /etc/apache2/sites-enabled/000-default.conf
And put another reverse proxy for SonarQube and your default enabled sites should be looks like the below.
 <VirtualHost *:80>
  ServerName yourdomain.com
  ServerAlias yourdomain

  RewriteEngine On
  ProxyRequests Off
  ProxyPreserveHost On

  ProxyPass /jenkins http://localhost:8080/jenkins nocanon
  ProxyPassReverse /jenkins http://localhost:8080/jenkins

  ProxyPass /sonarqube http://localhost:9000/sonarqube nocanon
  ProxyPassReverse /sonarqube http://localhost:9000/sonarqube

  AllowEncodedSlashes NoDecode

  <Proxy http://localhost:8080/jenkins*>
    Order deny,allow
    Allow from all
  </Proxy>

  <Proxy http://localhost:9000/sonarqube*>
    Order deny,allow
    Allow from all
  </Proxy>
</VirtualHost>
Then reload and restart your apache server.
$ sudo systemctl reload apache2
$ sudo systemctl restart apache2
Now you can use yourdomain.com/sonarqube/ to access your SonarQube instance.
So that’s it
Now you have used a reverse proxy to access your Jenkins and SonarQube instances with the same domain without ports. Use the same way with any other application running on a port if you require. If you have any suggestions or questions about this article, comment here.